How to contour Makeup like a pro: Beginner's guide
Do you want to know how to contour like a pro? The first step is to grasp the concept of contouring. When it comes to contouring, the goal is to use makeup that is slightly different from your natural skin tone to shape and define your features.
You can accomplish it on your own if you are handy with your cosmetics kit. Contouring does not necessitate the use of any additional tools beyond those already in your cosmetics bag. Makeup brushes and two tones of foundation will do the trick for you. When choosing two foundation tones, choose one that is lighter and one that is darker than your natural skin tone. ( Ideally, two shades up and down from your skin color should be perfect).

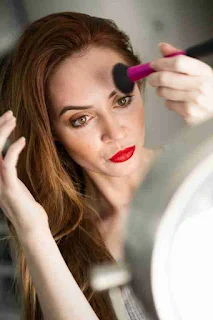
how to contour like a pro by bestaiding.comimage credit: unsplash.com

How to contour? : Step by step guide to contouring
step 01. Finding the face shape and preparing the face
First, thoroughly cleanse your face and apply primer. Primers are intended to keep your makeup in place and last longer. They will also help to protect your skin. They can aid in the removal of blemishes and the reduction of the appearance of fine lines and wrinkles. Knowing the shape of your face will make it much easier for you to decide how to contour or apply makeup.
Read the following description of face shapes and determine which type of face you have.
Round shaped face
- If the width and length of your face are very similar, and the widest part is your cheeks. Then you have a “Round shaped face.”
Long shaped face
- If you have a prominent chin with a face gracefully tapering towards the chin and an elongated feature from forehead to chin, then you got a “Long shaped face.”
Square shaped face
- If your forehead, cheekbones, and jaw are at the same width, and your jaw has sharp angles to it, then you have a “Square shaped face.”
Oval shape face
- If your forehead and jawline almost have the same width and your chin is round in shape. And your forehead is wider then, Your face is an “Oval-shaped face.”
Heart-shaped face
- If your chin is more pointer and your face is more taper towards the chin with a wider forehead, then you have a “Heart-shaped face.”
Diamond-shaped face
- Much similar to the Heart-shaped face but have a narrow forehead and a small chin. And if the widest part of your face is cheekbones, then you got a “Diamond-shaped face.”
You can find the best matching shape to your face using the above description. And determine which areas on your face you should contour and which areas should highlight. Your final goal should be to define the structure of your face by creating the effects of shadows and light.
step 02 - Creating the shadows
Create a shadow underneath your cheekbones using the darker shade. If you are not familiar with finding your cheekbones when applying makeup, what you should do is suck in your cheeks. And then trace the product along the hollows. Depending on the face shape you found before, you can identify the areas you want more depth. For most of you, it might look good if you contour along the jawlines, temples, the perimeter of your forehead, sides of your nose other than the hallow area on your cheeks. Contouring your neck and eyes also can help you to find the look you are looking for.
step 03 - Highlighting
Then, use the lighter shade and apply it to the areas you want to emboss. These are the areas of your face where the light would naturally be reflected. So, you better apply it on the bridge of your nose, the tip of the nose, on the chin, under the eyes, and the middle of your forehead. You can use your highlighter and eyeshadows also for this if you wish to.
step 04 - Blending
Next, as the most important step, you have to blend. As we earlier mentioned, contouring is all about shaping and defining the natural structure of your face using depth and light effects. So to look natural there should not be any harsh lines. Using the blending brush or your makeup sponge, blend your shadows and highlights into your skin.
step 05 - Finishing
And for the final, if you want, you can use a setting spray or a powder.

.jpeg)


0 Comments
Your ideas matters